Thursday, December 20, 2018

SLEIGH RIDES AND HOT COCOA

Hi, There!

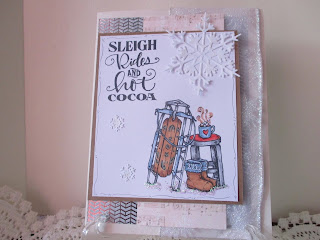
Oh, what fun to go sleigh riding and then have the hot cocoa to warm up!!!  I have many fond memories of doing this with our kids and grandchildren many years ago.  Now I will stay inside and have the hot cocoa ready for all when they return!!!  Thanks for stopping by, not sure if I will be posting much until after the Christmas festivities here.  Take care and many blessings for your holidays ~ CaroleAnn

CARD RECIPE:
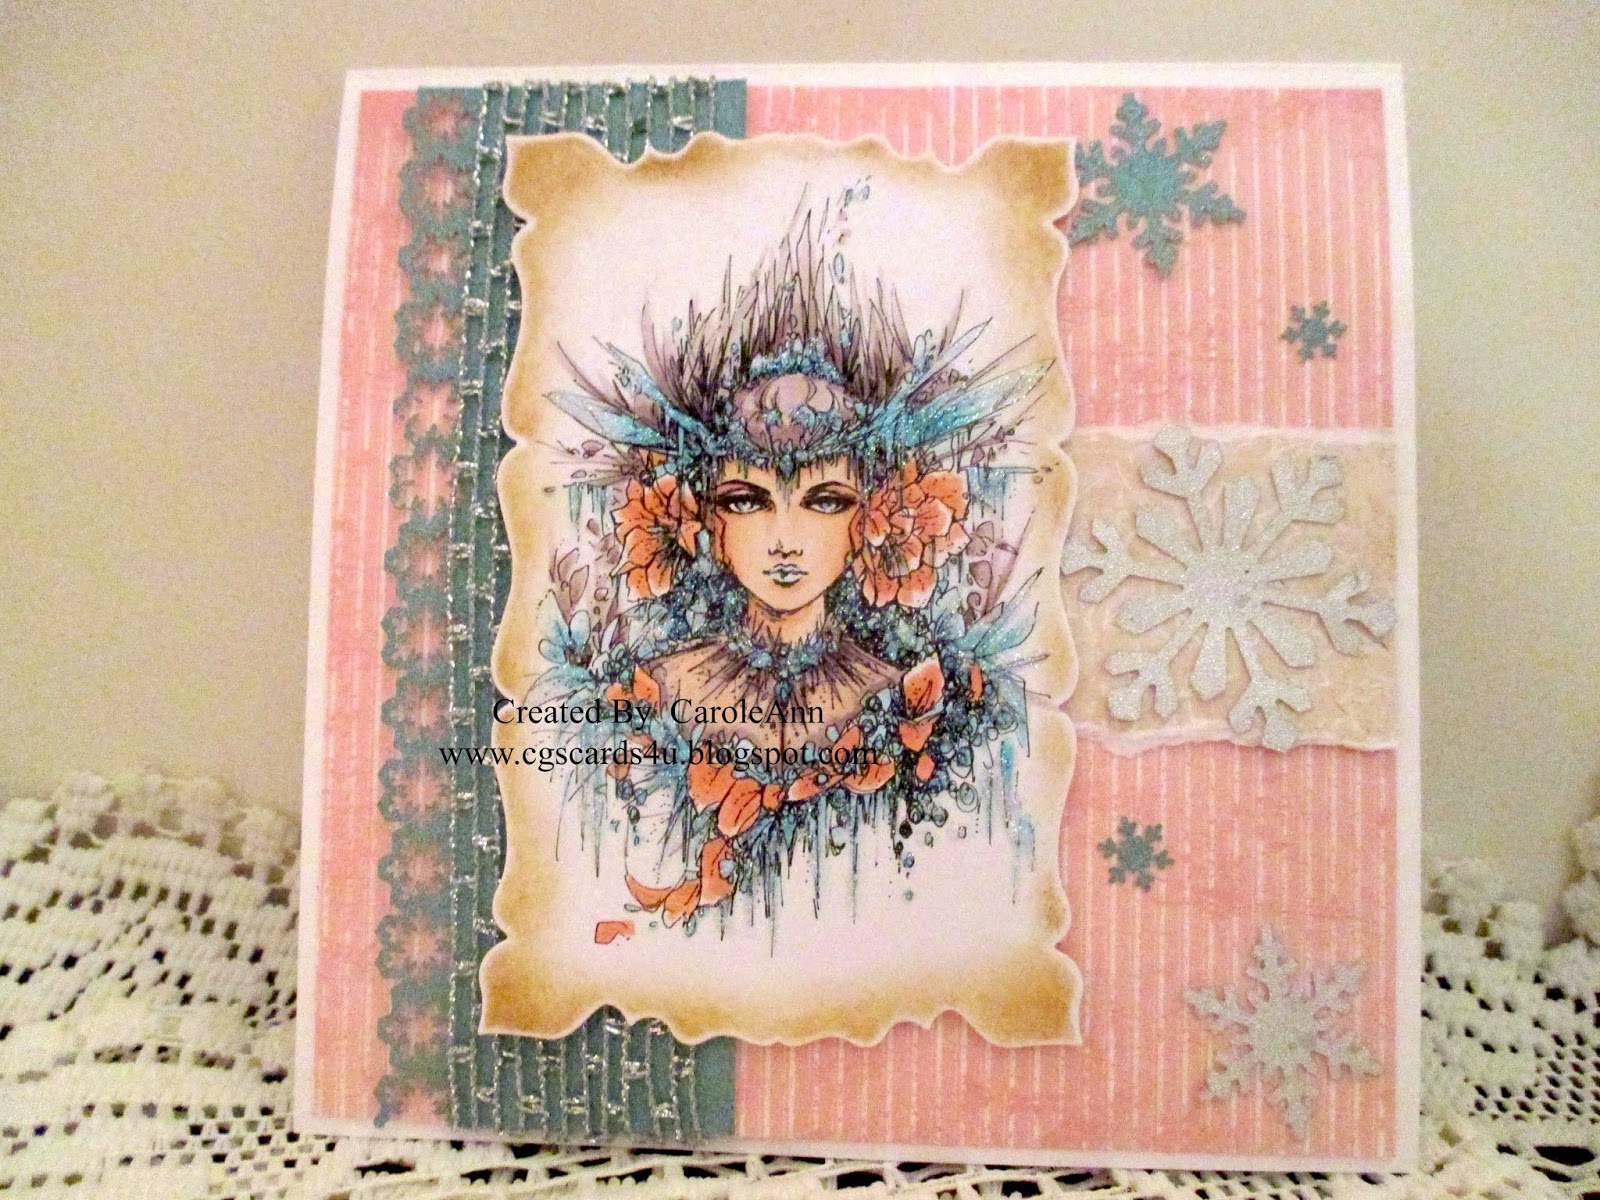
The image is from Flourishes/Snow Day/Marcella Hawley and colored with Copic Markers
C2 C4  E33 E25 E13  B91 B95  R14 R24   
The sentiment is from Recollections  Snowflakes die cuts from a mag freebie
 Ribbon from my stash and so is the background paper.

Friday, December 14, 2018

COOKIES FOR SANTA

Hi, There!

I saw this stamp and it just made smile!  This gingerbread cookie is just having a ball in that cup of cocoa.  This is another Whimsy Stamp and just so much fun to color that you find yourself smiling during the whole coloring session!!  Hope you get to enjoy some hot cocoa and gingerbread cookies and don't forget to leave some for Santa;)  Thanks for stopping by, be blessed, hugs ~ CaroleAnn

Card Recipe:
Whimsy Stamp/Cookies for Santa   Colored with Copic Markers
Fussy cut the image and using 3D foam mounted to die cut Spellbinder Scalloped circle and circle die cut from glitter paper.  The BP is from my stash layered with more glitter paper.  White cardstock base card that is 5 x 5.  Added some rhinestones and sequins from stash and ribbon also from stash.  Wink of Stella, Stardust, and white gel pen added for some details.

Sharing this card with:


Wednesday, December 12, 2018

PENGUIN CHRISTMAS

Hi, There!

Do you like penguins?  I do and Whimsy Stamps has to have the cutest images of these little guys.  I just want to have one here with me sitting at my craft table!  Don't let my cat know that as most times he is here with me sleeping under my table.  To do this little guy justice, I made a shaker card and I saw this on YouTube about a year or so ago and always wanted to try it!!  So enough blah, blah, thank you for stopping by and have a blessed day, till next time, hugs ~ CaroleAnn

Card Recipe:
Whimsy Stamps/Penguin Christmas Sweetheart   Chipboard Sentiment from Make It Crafty and colored with red Copic Marker
The image is colored with Copic Markers  ( I followed the YouTube version for colors)  Thanks, Heather!!!
C8 C6 C4 C1 C0 C00     R89 R39 R29 R22 R08   YR27 YR14 Y17

The card base is A2 red,  white cardstock was embossed with Sizzix Snowflake embossing folder.  Once I cut the circle with a die cut,  I used the circle in the background and distressed it with blue ink.   Filled up with lots of red and white glitter, beads, etc.  Stardust on his hat and Wink of Stella too!  Fussy cut the image, mount with foam tape and I used some snowflakes I found in my stash from Arnold Grummer's Iridescent Flakes!!

Sharing my card with:


Monday, December 10, 2018

THE REASON FOR THE SEASON

Hi, There!

I made three cards for this purpose as to keep my thoughts where they should be during this Christmas season.  Hope you like them.  I hope to get one or two more done in between all the whimsical images;)  Be blessed, always ~ CaroleAnn


All three cards have distressed oxide ink backgrounds.  Images have been embossed in black, gold, and/or white.  Mounted on a glitter background and an A2 card base.  Silver corners are from my stash.


Tuesday, December 4, 2018

MERRY AND BRIGHT

Hi, There!

Well, here it is the second card I made for my gift card giving.  Besides changing to the traditional red and green, I thought out the background paper better and the little bag can now be pulled out to receive their gift card.  There is a pretty greeting on the little bag and I did not want the recipient not to see that.  Have no idea where I found these little bags from but they made my day!!!  LOL  Don't you love when that happens.  Just need to check my stash more often!!!!!!

Till next time, thanks for stopping by, be blessed, hugs ~ CaroleAnn

Card Recipe:
Digital Image/East Wind/Holly and Ivy colored with Copic Markers
E0000 E000 E00 E01 E02 E11  Hair and Eyes  G40 G43 G24 G94 G85  Eyes have Glossy Accents
Berries R11 R24 R27 R29 R89
I framed image with some doodle and with B.Paper from First Edition/Merry Little Christmas.  Rub on sentiment from Tim Holtz Idea-ology and so is the sticker on the side portion.  Lots of Wink of Stella, Stardust, and Nuvo white enamel dots in her hair and holly and ivy on her head.  

I added corner quilling and a bow quilled to the little bag.  Inserted a "to and from" tag.

Sharing Card With:
Card Mania #111 - Christmas
Stamping Sensation - December/Winter- Sparkle


Sunday, December 2, 2018

A GIFT FOR YOU

Hi, There!

I have a couple of gift cards to give and I wanted to present them with a handmade card so this is what I came up with for one.  I did make another with the traditional red and green colors of Christmas which I may post at another time.  Thanks for stopping by, be blessed, hugs ~ CaroleAnn

Card Recipe:
East Wind Image/Holly and Ivy - colored with Copic Markers and lots of Wink of Stella in her hair and stardust in her holly and ivy wreath along with liquid pearls.  Eyes have Glossy Accents added to make them pop even more!  I just love her eyes!  

Image cut out with a Memory Box frame.  Sentiment from a mag freebie.  B.paper is from Vintage Frost/Maja Designs.  I found in my stash these little decorative Christmas bags and that is placed behind the image, along with another layer of cardstock with a holly image on it and I placed a word phrase sticker to the side/Tim Holtz/Idea-ology word phrases.  Added some rhinestones, snowflakes, flowers, and ivy stickers, from my stash.  Inside the bag is gift tag that I tied a wired ribbon to it and curled the edges. Now I just need to place the gift card inside that bag!  Done:)

Sharing This Card With:

Stamping Sensation - December/Winter - Sparkle
A Gem Of A Challenge #232 - ATG


Sunday, November 25, 2018

BEGINNING TO LOOK A LOT LIKE CHRISTMAS!!

Hi, There!  UPDATE:  You can find the EastWind digital images on Etsy.

Yeap, it's me again and now with card number two made with the digital image called Baby Its Cold from a retired company called The EastWind by artist Unky.  Loved her artwork and as I said in previous post, I do have many of her digital images and I love them all!  So here she is again but colored in the true Christmas colors of Red and Green.  Thanks for stopping by, and hope it is not too boring with using the same image but she is really cute and fun to color!!!  Big hugs and lots of blessings ~ CaroleAnn
Card Recipe:
Digital Image/Baby Its Cold/EastWind - colored with Copic Markers
Skin E0000 E000 E00 E02 E01 E11
Hair E70 E71 E74 E77  Eyes G40 G43 G24 G94 G85  Glossy Accents added
Outfit  YG13 G24   R24 R27 R29
Image framed with Stitched Nesting Rectangles from Tuttidesigns and edges distressed with Shabby Shutters.  Glitter added to heart on mittens.  Wink of Stella on hat, hair, and mittens.
BP from my stash - not sure where it is from and ribbon also from stash.  
Snowflake Border from Memory Box and lots of glitter added.

Sharing card with:
613 Avenue Create #215 - ATG Optional Twist - Christmas
Addicted to Stamps #168 - ATG Optional use of ribbon (my bow) 
Christmas Card Throwdown - November Stash Challenge - Ribbon and Glitter


SENDING WARM HUGS YOUR WAY!

Hi, There!  UPDATE  You can find the EastWind digital images on Etsy.

I have an image that is from The EastWind and I have many of Unky's artwork digital images and this is one of them that I like so much that I made two cards but this is the post on card number 1.  Thanks for stopping by and stay warm with a fuzzy hat, warm scarf and mittens!!!  Hugs and blessings ~ CaroleAnn

Card Recipe:
Digital Image Baby Its Cold - colored with Copic Markers:
Skin E0000 E000 E00 E02 E01 E11 
Hair Y11 Y08 Y13   Eyes G40 G43 G24 G85  Hat/Gloves E33 E34 E35  G24 G94 R56 R59
Make It Crafty Chipboard "hugs" colored with Copic Markers
BP from stash Bo Bunny  Image is framed with TuttiDesigns Stitched Nesting Rectangles and distressed with Brushed Corduroy ink.  Snowflake and Snowflake corner die from Sweet Dixie and used lots of glitter on these.  Her eyes have a glossy accent and hat, mittens and hair lots of Wink of Stella.

Sharing this card with:


Tuesday, November 20, 2018

SNOW QUEEN BLOOMS

Hi, There!

What fun it was to color this image.  This is a digital image from Aurora Wings - one of my many favorites.  It is going to get cold enough here tomorrow night that I could just possibly have these icicles hanging off me too - but I would not look this elegant.  She is really beautiful.  I have to color another one up but I am thinking maybe purples and blues!  Have a wonderful Thanksgiving to those celebrating, so much to be thankful for in my family this year.  Thank you for visiting me.  Blessings to all, big hugs ~ CaroleAnn

Card Recipe:
Image from Aurora Wings/Snow Queen Blooms  Colored with Copic Markers
Skin E0000 E000 E00 E11
Blooms E93 E95  E70 E71 E74  B0000 B00 B01
BP is from Winter Wishes/First Edition  Snowflake border and snowflakes are all from MS punches with glitter paper from my stash.  Sparkle silver netting ribbon from stash.  The image has lots of stardust glitter and Wink of Stella and framed with a Rustic Die Cut frame and used distressed ink around the edges.

Sharing my card with:
613 Avenue Create #215 with optional twist winter
Artistic Inspiration #209 ATG
Aurora Wings #73 Holiday Spirit
Crafting From the Heart #229 ATG
Crafting With Friends #75 ATG
Simon Says Monday  Let It Snow


Tuesday, November 13, 2018

CELEBRATE!!!

Hi, There! 

I made this birthday card thinking I was going to used it for my granddaughter for her 3rd birthday but I found out she is having a Tea Party Style birthday so I pulled out some other stamps from Polkadoodles that I will now create another card for her!!!  LOL  Thought I was ahead of the game - but, hey, birthday cards are always in demand!!!  Thanks for stopping by and be blessed, hugs ~ CaroleAnn

Card Recipe
Okay, thanks to my friend, Carol, I now know that this image is from Eureka Stamps and it is Girl Balloon Holder digital stamp.  :)  She is colored up in Copic Markers:
E0000 E000 E11 E95  Y11 Y13 Y32   R81 R83 R85  V01 V12 V04
Balloon die-cuts used after I used some distress oxide inks on Mixed Media paper.  The background paper I have had forever from DoCrafts/Kraft Notes 6 x 6   Stamped the sentiment "Celebrate" on vellum and embossed in gold.  Used some cut outs from the designer paper here and there.

Friday, November 9, 2018

Hello Everyone - I am back!!!!

So happy to say I can now spend more time at my art table and this is what I painted for my first post back after my hip replacement surgery!!!  I am now back to taking my walks too!!  Praise the Lord as all went well!

I just left this image mounted onto a white card base and used a Memory Box Wrapped Stitch Frame for it.  The digital grey scale image is from Alena Lazareva/Fantasy Fairy and I have had it for ages.  I used Copic Markers and I love the soft look of the colors that happens with the grey scale.  I could not make up my mind whether to use glitter on her wings or not - so I left them as is - for now;)

I know you have all been busy with holiday cards already, maybe I will have one or two to share but I am just getting back to coloring and have so many images I love that I do not know which one to start next!!!!  Till next time, big hugs and blessings, ~ CaroleAnn


Card Recipe:
Copic Markers
Skin  E0000 E000 E00 E11 E01 E02 E93 E95
Hair  E51 E55
Dress  V0000 V000 V01 V12  Wings  B0000 B91 B21 V000  Eyes  BV00 BV13 V01
Flowers  Y21 Y23 Y11 VOOO V01 G21 G20 Y38

Friday, September 21, 2018

LET'S PLAY SNOWBALLS!!!!

Hi, There!

I know it is way too early for snow here on the East Coast but this is the image I chose for my last spot as Guest Designer for our Colour Crazy Challenge that starts on Sept. 21.  


I hope you can join in for this challenge and it is always ATG but please remember you must have something on your project that is hand colored.  A shout out to Ruth for inviting me as a Guest Designer - this was lots of fun so thank you for this opportunity!!

Our sponsor is The Paper Shelter and I love their images and background papers too!  
Thank you to our sponsor:


This may be my last post for a little while, but I plan to be back before the end of this year.  Thanks for all your comments and taking a peek at what I create.  Many wishes to all for a blessed Fall Season that is coming our way, stay well, till next time ~ Hugs and blessings, CaroleAnn


My card for this GD spot:
Card Recipe:
Digital Image/The Paper Shelter/Little Girl colored with Copic Markers;
Skin E0000 E000 E00 E01   Hair E70 E71 E74  Outfit E23 E35 R56 R59 B00 B01 G21 G24
Used MS snowflake punches with some glitter paper.  Made the bottom look like a snow pile with some white tulle and added gesso and glitter.  Finished up with some Nuvo Drops and fussy cut the image and mounted with 3D foam tape.  The background paper I purchased from The Paper Shelter a while ago and it just finished it all off nicely.  

Thursday, September 20, 2018

AUTUMN BREEZE AND COFFEE PLEASE!!!!

Hi, There!

First, my thoughts and heartfelt prayers are with everyone along the wide path of Hurricane Florence.  Let there be provisions, strength, and comfort for all those in need.

Cooler weather arrived here and gave me a burst of energy and I had my first cup of Pumpkin Spice Latte so that explains this card fully for me!!!  LOL

Thanks for stopping by and hope to get in one or two more posts before next Friday and then I will be quiet for about a month and then hopefully back again.  Until my next post, blessings and hugs ~ CaroleAnn

Card Recipe:
Digital image/Autumn Breeze and background paper from The Paper Shelter.  Sentiment and coffee mug from Verve/Pumpkin Spice.  Fussy cut leaves from DP from my stash.  Ribbon and lace added at an angle at top of card.  Nuvo drops, stardust glitter, Wink of Stella added for bling.

Image colored with Copic Markers and Promarkers
Skin E0000 E000 E01 E00 E93
Hair E30 E31 E33 E35
Scarf E70 E71 E74 E77
Bench Y21 Y23 Y26
Stockings Promakrers/Vanilla, Cinnamon, Tan
Outfit E70 E71  G21 G40 
Shoes Promarkers/Vanilla, Ginger
Leaves  Promarkers/Vanilla, Meadow Green, Marsh Green, Pumpkin
Image framed with Rustic Precious Marieke
distress ink/Antique Linen around the edge of the frame
Sentiment from Verve/Pumpkin Spice and Verve Label Die

Sharing this card with:


Saturday, September 15, 2018

BEE HAPPY - Even with technical problems!!!

Hi, There!

I surprised myself with getting this card done so just had to get it posted.  Then realized my camera SD card would not work in my pc.  I am hoping it is the card and not an imaging problem on my computer's side.  I use an old camera (Canon PowerShot) and the SD card is probably as old as the camera:(

So I just took a picture from my old camera view screen with my iPhone and tried to load it up here - poor quality but it gives you an idea of what I made - I think!!!!  

I do not have the card in front of me as I have already sent it out to my sister.  So from my photo, I am trying to remember how I finished it off!!!  LOL  Thanks for stopping by, hugs and blessings ~ CaroleAnn

This is a shaker card and the stamped images, and paper are all from a magazine freebie.  It even had an embossing folder of a honeycomb strip.  Love this month's edition.    

The flowers I fussy cut and mounted to frame front.  The embossed sentiment was cut out with a flag die cut.  Beehive and bee were embossed and colored and mounted to the acetate front at the top.  Inside the frame is the paper from the set which says - Bee Happy and Beeutiful with little bees flying around.  The other background paper is gold embossed honeycomb.  Really great freebie from UK magazine for card makers!!!! 


Friday, August 24, 2018

DEEP BREATH!!!!

Hi, There!

My son-in-law turned 50 last week and yes, I am late with my card!!!  Just had to make him one that I know would put a smile on his face.  Made a shaker card which I have not made in quite some time and it was fun!!

I had a whole bunch of August birthdays to get done and just took so long to make them all.  My time is limited at how long I can sit due to some arthritic and hip problems but I am working around it so far - slow but sure;)

Will be going in for hip replacement next month so I will be out of the game of making cards for a while but plan to be back as soon as I am up to it.  Perhaps by October, I should be up and running, well, maybe not running!!!!  LOL

Thanks for stopping by, hugs and blessings ~ CaroleAnn


Card Recipe:
The image is from AI/Deep Breath and colored with Copic Markers.  I used a Frame die-cut from Whimsey Stamps called Shaker Frame Rectangle.  Acetate and foam added to the frame and then the fun Toppings from Queen & Co. and some sequins from my stash!!  Stamped an extra cake so I could put it on the front with a 3D foam.

Thursday, August 23, 2018

WINNIE WONDERLAND TIME

Hi, There!
Another challenge has started at Colour Crazy Challenge Blogspot for August 24th.  Hope you can find time to join in!  Just remember you need to show something on your card/project that has been hand colored.  Our sponsor for this month is:
I love Polkadoodles and have a number of their Winnie stamps and can never make up my mind which to color first.  

But for my second post as a Guest Designer, I chose this image, Winnie Wonderland Time and I gave my card creation more of a fall/Halloween theme to it:)  I think I am just trying to keep cool with all these heat waves going on.  My next card is definitely going to be snowflakes and snowballs!!!  LOL

Thanks for stopping by, until next post stay cool, hugs and blessings ~ CaroleAnn

Card Recipe:
Image from Polkadoodles/Winnie Wonderland Time
Copic Markers:
Skin: E0000 E000 E00 E21 E11  Hair: E50 E23 E25 - lots of Wink of Stella
Outfit:  B91 B18 B45  E08 E97 R59   Clock:  Y21 Y26 Y28 - Lots of Star Dust
The image was framed with a die cut from Memory Box/Wrapped Stitched, used Distress Ink/Antique Linen around edges and mounted with 3D foam to paper from my stash.  The rest of the papers used in the background and the little cards are from both Graphics 45/Halloween in Wonderland and BoBunny/Timepiece.  Ribbons and flowers are from my stash.


Thursday, July 26, 2018

YOU ARE MER-MAZING and RUBY BIRTHDAY STYLE

Hi, There!

It has been a while for me but I am back.  This is my first post as Guest Designer for Colour Crazy Challenge for the beginning of their challenge on Friday, July 27th.  So excited to be part of this wonderful design team.  Join in on the fun with their challenge but just remember you have to show something colored in your card/project.

WEEK 30
Our generous sponsor


I chose two images to use for this July challenge and both are from Polkadoodles  The first one is called Meribelle and you can find it HERE

I decided to make an easel card as I have not done one in quite some time and this image just needed the 6 x 6 card space I gave her to float around in!!!!! LOL

She is just so sweet and I love how her adoring dolphins are gazing at her!!  Polkadoodles has so many wonderful digital images, check them out.


Card Recipe:
Polkadoodles image is die cut from an oval die cut from Hero Arts and shaded with Distress Ink/Peacock Feathers and mounted with 3D foam.
Copic Markers:
E0000 E000 E11 E93 E4    Hair Y00 Y11 Y13 Y15 BG000 BG01 BG02
Body Y00 Y11 BG000 BG0000 BG01 BG02 BG05    Dolphins BV0000 BV000 BV00
Eyes B00 B04    Ribbon/Flowers YR000 YR01 YR02

Distress Oxides  Fossilized Amber  Peacock Feathers  Wilted Violet
Background made with a stencil from Hero Arts with Distress Oxide inks.  Sentiments from Hero Arts embossed in black.  Die cuts of plants from Hero Arts.  Border inside is from Memory Box/Big Splash and I used Distress Oxide inks and lots of Shimmer Spray.  Fish stamps from Hero Arts. 
Sequins/28 Lilac Lane/Seaside Holiday and Jewels from Little Things/Ice Cube Mix
 Lots of Wink of Stella

Sharing this card with:
The Fairy and the Unicorn - July - Under the Sea option

RUBY BIRTHDAY STYLE
Second Image is called Ruby also from Polkadoodles!  I would love a dress like the one she is wearing!  And her shoes!!!  Not that I could walk in them now!!!  LOL  Thanks for stopping by and until next time, hugs and blessings ~ CaroleAnn


Card Recipe:
Image from Polkadoodles and colored with Copic Markers
Skin E0000 E000  E00  E21  E11  E93  E04
Hair  E70  E71  E74
Outfit  BG11  BG15  BG23  BG32   R81  R83  R85
Wink of Stella on her dress and flowers
Image framed with a Rustic Nesting die and shaded with distress ink
Papers used from an old stash I have from DCWV - The Primrose Stack
Flowers from Verve and used the die/Beautiful Flowers - colored with Copic Markers and shaded with distress ink.   Chipboard words from Make It Crafty - colored with Copic Markers
This is a 6 x 6 square card.

Sharing this card with:
Crafty Calendar Challenge - July - Totally Girly
Crafting With Friends  #72 - ATG
Simply Papercrafts  #59 - ATG


Tuesday, June 5, 2018

YOU ARE TREASURED

Hi, There!

Okay, so I made more than one of these mermaids and just wanted to apply it to one more card.  This time I made it into a shaker card using the beautiful frame die cut from Hero Arts May month kit called Reef Border. The mermaid image is from Stampendous also die cut. 

I used two backgrounds before I applied her.  One is my sparkle paper from Recollections, and the other that was applied over that one is from the same Hero Arts May set which was a white swirl tissue.   I used some sequins from this kit and added some from 28 Lilac Lane Seaside.  I used Distress Oxide Ink to shade around the frame and added one die cut fish from Stampendous.  The sentiment is from the same kit.  Thanks for stopping by and hugs and blessings ~ CaroleAnn


Image has been colored with Copic Markers.  Frame mounted with lots of foam tape for dimension.

Sharing this card with:

Cuttlebugmania - Frame It
Digi Choosday Week #23 - ATG
Lemon Shortbread #69 - ATG


Saturday, June 2, 2018

THE SEA OF LIFE

Hi, There!

Okay, not wanting to be boring but here is another under the sea image.  I just love mermaids and I can paint them all day if I didn't end up boring myself!!!  LOL

Picked this image up from Michaels during a sale and it is a Stampendous stamp and die cut set.  I really like the images in this stamp set.  Also, I love how they give you coloring examples on the back of the packaging.  So here it is without further ado.  Thanks for stopping by and have a blessed day, hugs CaroleAnn

Card Recipe:
Stampendous Stamp Set and Dies.  The background was done with Distress Oxide Inks, added some Shimmer Spray and water splatters.  Sentiment from the same set and embossed with Versa Fine Majestic Blue.  Fish have been glued to the background but the mermaid has been added with 3D foam tape.  Lots of Wink of Stella on all the sea creatures and Stickles Stardust on her crown and crystal ball.  Mounted the whole card scene onto a blue glitter paper from Michaels and then onto a white card base.  There is another turtle inside the card - I always add something inside my cards to match the front.
Copic Markers Used:
Skin  E0000 E000 E00 E11 E93
Fins BG11 BG32 BG13 YG000
Fish & Turtle Y02 Y18 Y35 Y38 Y15 Y28 BG32 BG11

Tuesday, May 29, 2018

UNDER THE SEA

Hi, There!

We have a number of graduations going on and someone I know loves mermaids so this card was made with her in mind.  This is one of my favorite digital images and I had to fussy cut this one as I did not want to cover up the background and she just looks perfect floating in this background.  Thanks for stopping by, until next time, hugs and blessings ~ CaroleAnn

Card Recipe:

This is a digital image from Aurora Wings - Ribbon Mermaid.  The background was done with Distress Oxide inks and spattered with water and then sprayed with Shimmer Spray.  Wish the photo could show the shimmer in the background as it is very pretty.

Sentiment used is from a Hero Arts collection. I used a piece of an old shower pouf and added to the side of the image for dimension and texture interest.  Added some liquid pearls to the image and lots of Wink of Stella.  Added pearls to netting and background.  Stardust glitter added to netting and fins.

Copic markers for image: 
Skin E0000 E000 E11 E93 
Hair YR000 YR00 YR01 YR68 YR07
Body/Fins BG11 BG32 BG13 YR21

Sharing my card with
Aurora Wings Challenge #67 
Polkadoodes Crafting Challenge #21 ATG
QKR Stampede #297 ATG


Tuesday, May 22, 2018

SENDING SUNSHINE

Hi, There!

Since I had colored two backgrounds to start with, I decided to make one more sunflower, sunshiny type of card.  But another reason is that it is raining here, again, and cold and damp.  Another image from Make It Crafty - Carlie with flowers.  I love these little girls and how her little legs are shaped.  I have a picture of my sister and me together in our Sunday best and our Mary Jane shoes and I swear we are standing just like this little girl!!  LOL

Hope you are enjoying some sunshine.  We are supposed to be getting some sun tomorrow, but in the meantime, I am enjoying these colorful sunflowers in Carlie's garden;)  Thanks for stopping by, until next time, hugs and blessings ~ CaroleAnn

Card Recipe:
Background colored with Copic Markers as the previous post and added the cloud background with an MFT cloud stencil using Distress Ink/Broken China.
Digital image, Carlie colored with Copic Markers
Hair - E70 E71 E74   Flowers Y02 Y04 Y13 Y15 Y18 Y38YR15 YR09 G03 G21
Dress B0000 B01 B02 YR21 YR23    Eyes - Glossy Accents    Wink of Stella in her hair
Fussy cut out the image and mount with 3D foam
The card base is beige with yellow and blue backgrounds to frame the final image
Added chipboard from Make It Crafty "Sending Sunshine" painted with Copic Markers in blue and yellow and added Stardust Stickles on words and flowers.

Sharing this card with:
Make It Crafty Coloring Challenge - Flora - Month of May
Artistic Inspiration #200 - ATG
Create and Inspire #74 - ATG
Crafting From the Heart #207 - ATG
Crafting With An Attitude #39 - ATG - Month of May
Crafting With Friends #67 - ATG
Get Creative #69 - Lots of Flowers - Month of May
SSS Monday Challenge - Inspired By A Song - "You Are My Sunshine"
SSS Wednesday Challenge - Stencil It


Thursday, May 17, 2018

SUNFLOWER GREETINGS!

Hi, There!

I will settle for sunflowers - sun being the operative word in this post!!!  Our sun has left us here and the weather channel reports not much sunshine until next week!!!

So here is a bright and happy sunflower card to brighten up your days if you are in this area.  The digital background and the image on the front are both from Make It Crafty.  I love this little girl's face and, of course, her eyes and hair;)

Thanks for stopping by and have a sunshiny type of day!  Hugs and blessings ~ CaroleAnn

Sharing this card with:
Make It Crafty Coloring Challenge - Flora - Month of May
Artistic Inspiration #200 - ATG Every Two Weeks
Create and Inspire #74 - ATG/Optional Springtime Month of May
Crafting From the Heart  #206 - ATG Weekly
Crafting With An Attitude #39 - ATG Month of May
Crafting With Friends #67 - ATG Every Two Weeks
Get Creative #69 - Lots of Flowers - Month of May
SSS Monday Challenge - Stencil It  Weekly
SSS Wednesday Challenge - Stencil It Weekly
Whoopsi Daisy - ATG with option die cuts Month of May

Card Recipe:
Digital Background is colored with Copic Markers.  Digital image - Faye's Sunflowers colored with Copic Markers and some Wink of Stella/Hair, Stardust/Flowers, and Glossy Accent for her eyes.
Used a Cloud Stencil from MFT in the background with distress ink - Broken China.  Added some enamels that sparkle. 
Die cut used is from Spellbinders "Hello"  - added Stardust Stickles.
Fussy cut Faye and 3D foam used to give dimension to little Faye in front of her garden!

Skin - E0000 E000 E11 E93
Hair -  E53 E 55
Dress Y11 Y13 Y15
Flowers  YR21 YR23 YR09 YR68  BV01 BV02 V09  B23 B26  R35 R29
RV21 RV32 R85  YG13 G43 G24 G99
Fence  E55 E57
Grass  YG13 G43 G24 G99 G94


Saturday, April 28, 2018

BIRTHDAY HUGS FROM PARIS

Hi, There!

Here is my last birthday card for April and this is for my sister.  I have sent her a few and this is the last one.  She enjoys getting mail and of course, my cards - my biggest card fan!!!!  

I did this image once already and had to do it one more time.  I think she will like it!!!  More spring-like colors for her as I feel spring has finally come here to stay!!!!  Classy Olivia is having a fun time and I am wishing my sister and I would have such a fun afternoon together someday - maybe not in Paris but either here together in New York or I can get to her in Florida!!!  Someday!

Thanks for stopping by - hugs and blessings ~  CaroleAnn

Card Recipe:
The digital image is from Make It Crafty/Classy Olivia colored with Copic markers as follows:
E0000 E000 E00 E01 E11 E02
Hair E30 E31 E33   Flowers & leaves - YR13 G14  R81 R83 R85
Then mounted with 3D foam in front of a black and white digital image from Make It Crafty/Paris Sidewalk.  I only painted the leaves and flowers around the storefronts.  
Chipboard "birthday" is from Make It Crafty painted with Copic Markers
Hugs is die cut with an Avery Elle die 3x on black cardstock and glued together for dimension.
Lots of Wink of Stella on hair.  Glossy accents for her eyes and sunglasses!

Sharing this card with:
Get Creative #68 - No Pattern Paper
Whoopsi Daisy - ATG/Optional - Spring Flowers - April
Artistic Inspiration #198 - ATG
Create and Inspire #73 - Dies/stencil
Dies R Us - #95 - Springtime
Crafting With An Attitude #38 - ATG
Crafting from the Heart #203 - ATG
Crafting With Friends #66 - ATG


Friday, April 27, 2018

FRAGRANCE

Hi, There!

I have so many birthdays in April, so here is one being posted for a friend and sister from my church.  But I missed the exact date of her birthday but I just could not pass up a reason to make her a card because she is so loved by all in the congregation and a very special person to me! 

I did not have any belated sayings so I just know this spiritual saying will be just perfect for her.  Will post another birthday card tomorrow.  Thanks for stopping by and visiting me, have a blessed weekend, hugs and blessings ~ CaroleAnn

Sharing this card with:
Artistic Inspiration #198 - ATG
Crafting With An Attitude #38 - ATG
Create and Inspire #73 - ATG/Optional use of die or stencil
DiesRUs Challenge #95 - Springtime
Get Creative #68 - No Pattern Paper
Whoopsi Daisy Monthly April - ATG/Spring Flowers
WordArt Wednesdays - Weeks #332-#333 - ATG/Optional use of their scripture

Inside View:


Card Recipe:
Made my own background on the inside of the card using the stamp set from Our Daily Bread Designs/Fragrance and repeated that on the front but used a die frame on the front - Precious Marieke Foral Frame.  Restamped the flowers from the same stamp set and fussy cut and mounted on the front of the card.  The sentiment on the front and inside of the card is from the same stamp set framed with a die cut label from Spellbinders.  Used a butterfly from my stash, liquid pearls in the center of flowers - they are wild roses.


Wednesday, April 18, 2018

OKAY, LIGHT THOSE CANDLES!!!!

Hi, There!

Once I saw this delightful lady with the fire extinguisher, I just had to make my son one more card!!!!  LOL

Thanks for stopping by, hugs and blessings ~ CaroleAnn


The view once the card is open:
The image is from AI and I colored it with Copic Markers and used a die stitched frame and the sentiment is also part of that stamp set.  Everything else added to the background papers was done with stickers from my stash and the Happy Birthday in the center of the inside of the card is a die cut.

Tuesday, April 17, 2018

FLOWERS OF FAITH

Hi, There!

Watched a youtube video from Sandy Allnock (here ) and was inspired to try this.  She has such great video inspirations!  Thank you, Sandy!

Used some watercolor paper and stamped the flower images in Versa Black ink (waterproof) The background was created with my watercolor paints; added some splatters of paint.  

Both stamp sets are from an older version of Flourishes - Zinnia (2011) and the second card was made with Flourishes - With Gratitude (2010).

In one card, I used enamel dots for the centers of some of the flowers.  The sentiment on that card is from Penny Black - Hope Shines.

The second card has a different flower arrangement and the sparkle enamel dots are placed here and there.  That sentiment is from the same stamp set (With Gratitude).

Wink of Stella used in both cards and mounted the watercolor paper on black cardstock that I edged in gold.  Added that to my white 5 x 7 card base!  I am pleased with the outcome of these quick cards!  

Thanks for taking another peek at my attempt at feeling like spring!  LOL  Hugs and blessings ~ CaroleAnn


Sharing this card with Penny Black Saturday Challenge - ATG/Spring


In this card, I did use some Stardust on the butterflies which are part of this stamp set.

Sharing this card at:

Artistic Inspirations #198 - ATG
Allsorts Challenge #463 - Spring Flowers/Showers
Crafting From the Heart #202 - ATG
Get Creative Challenge #68 - No Pattern Paper
Whoopsi Daisy - ATG/Spring Flowers -  Month of April
Word Art Wednesday Weeks #330-#331 - ATG/Scripture


THINK SPRING FLOWERS

Hi, There!

I did say "think" spring flowers because for us here on the East Coast of New York, upstate, it is still cold, damp and windy!!!  I am still in my winter clothes too.  I am having a lot of trouble with this prolonged winter in my bones this year BUT - it will soon pass and the sun will shine and will enjoy it all and be thanking the Lord for the sun;)  

Thanks so much for stopping by and I hope you have some rays of sunshine you are enjoying even if it is in our thoughts of "spring flowers"!  LOL  Hugs and blessings ~ CaroleAnn

Here is my card created for thinking of flowers:

I stamped a floral image from Flourishes called Zinnia onto watercolor paper.  This is an old stamp set from 2011. I used watercolor paints (Winsor & Newton).  Applied Wink of Stella to the flowers and added some enamel gemstones from my stash.  

The sentiment is from Penny Black called Hope Shines - love this set too!

Sharing this card with:

Wednesday, April 11, 2018

BUNNY HOP

Hi, There!

Went thru my stash of wood mounted stamps again and found this delightful stamp from Stamping Up!  Image was stamped with Versa black ink and embossed with clear embossing powder.

Copic markers used:
E01 E0000 E30 E34 E35 E37 G21 G24 G29  RV21 RV32 RV11  Y11 Y15 Y19
Applied some Distress Ink - Tumbled Glass - to the background of the image for the sky.

This is a 5-inch square card base and used a Precious Marieke Spring Flowers die frame on top of the image.  Applied some rhinestones on the flowers for some sparkle.  Die cut the sentiment which is from Lily of the Valley.  Thanks for stopping by, hugs and blessings ~  CaroleAnn

Sharing card with:
The Sisterhood of Crafters - Rabbits
Sunny Day Crafting #15 - Bunnies
613 Avenue Create #208 - ATG/Optional twist

SENDING HUGS FROM PARIS!!

Hi, There!

No, I am not in Paris but my digital image is!!!  Just like a good book, a good image background can take you away!!  This background, Paris Side Walk and the young lady strolling in front of the shops is Classy Olivia both are from Make It Crafty. 

I left the background as it was printed in black and white.  I spotted this technique over at Make It Crafty and decided to give it a try for myself.  I had fun!!!  Olivia was colored with Copic markers and then fussy cut and mounted with 3D foam to the background.

Copic Markers as follows:  Hair E70 E74 E77 E79  Outfit R27 R46 R89 B21 B24 B26 C1 

The sentiment "Sending" is a chipboard from Make It Crafty and the "hugs" was embossed with white embossing powder on a piece of black cardstock. 

Lots of Wink of Stella on her hair and clothes and the chipboard.  Glossy Accents on her sunglasses and her eyes. 

The scene has a black cardstock base that was applied to a sparkle red card base with 3D foam tape.

Thanks for stopping by, hugs and blessings ~ CaroleAnn


Sharing card with the following challenges:
Crafting From the Heart #201 - ATG
Crafting With an Attitude #38 - ATG
Create and Inspire #73 - ATC/Optional use of a die or stencil
The Paper Nest Dolls April Challenge
Word Art Wednesday Weeks #330-#331

Tuesday, April 10, 2018

HAPPY SPRING - COULD IT BE??


Hi, There!

Okay, the weather is supposed to warm up here on the East coast for the weekend so I decided it is time for some spring like flowers.  I went thru my stash of old wood mounted stamps and found this PSX older stamp and it was perfect to color up with Copic Markers.  Fussy cut the image and mounted with 3D foam tape onto a die cut background that was mounted onto some glitter paper.  Used a circle die cut and cut it in half for the sentiment addition.  Done!!!  Thanks for stopping by, hugs and blessings ~ CaroleAnn


Sharing card with following challenges:
Crafting From the Heart #201 - ATG
Crafting With an Attitude #38 - ATG
Create and Inspire #73 - ATG/Optional use a die or stencil - die frame/Tutti Designs Garden Background and a Lily of the Valley circle die cut
The Paper Nest Dolls April Challenge

Sunday, April 8, 2018

YOU ARE SO LOVED!

Hi, There!

I am really falling behind on my card making.  Just so busy with everyday stuff lately and it has been so cold my arthritis has given me a time out for crafting on some days:(  But that is okay, take everything in stride and keep a smile on your face - it helps and of course, my prayers to the Lord to give me the patience and strength needed to get thru each day:)

My grandchildren, Jhanya and Freddy, are turning 20 years old this month and I am so proud of both of them.  I can remember when I made a card for them each and posted it on my blog here and they were only 8 years old!!!!  Now I am back for them - where does the time go!!!!  My husband and I are very blessed to have such wonderful memories thru their growing up years with us.  I thank God each and every day for them.  They are blessings from above to both of us.

The first card is for Jhanya and the second is for her twin brother, Freddy!!
I used 3D foam to pop up the flowers and the butterflies.  The Scripture is computer generated and die cut with a frame and used distress ink around the edges and that is also popped up.

Thanks for stopping by, hugs and blessings to you and yours always ~ CaroleAnn

Sharing this card with, Word Art Wednesday, as I got the Scripture idea from their last challenge but I was too late to enter it! -  WordArt Wednesdays Weeks #328-#329 - ATG

This is Freddy's card:

Saturday, March 24, 2018

HAVE A MAGICAL DAY - PRINCESS & PRINCE STYLE AND DRAGON TALES

Hi, There!

NOTE:  PHOTO HEAVY

The sun is bright today but still very cold but I will take it!!!  I hear more birds each and every day and I think that is a good sign of spring coming soon;)

I am just sharing some more prince and princess cards I have made.  I will be donating these cards to Send A Smile 4 Kids and the Card Connection as needed.  Thanks to Jess - she has a great resource blog page if you want to donate cards here.

All these cards were made by using my supplies from Scrapping For Less kits and some from my stash like my doily and ribbon and large pearls.  All images are stamps that were colored with Copic Markers.  So much fun!

Have a blessed day and big hugs ~ CaroleAnn

ONCE UPON A TIME PRINCESS


ONCE UPON A TIME PRINCE

THIS IS A CARD BOOK FOR A LITTLE PRINCESS


DRAGON TALES CARDS - This one made just with the papers, stickers and
my scallop circle die cut

The following two cards made from DRAGON TALES SUPPLIES with Stamping Bella
Dragon and sentiment.